Hello Guy’s
This is Ravi Verma, in this article I will tell you about how to file Nil EPF Return.
Let’s start,
- What is EPF?
Provident fund (PF Act, 1952) is one of the main savings platforms in India, When an employee works in a company, he is paid a salary by the company and under this, the employer deducts some amount from his salary and deposits it in the Employees Provident Fund, And the percentage by which the employer deducts some amount from his employee’s salary and deposits it in his employee’s provident fund, the same amount is deposited by the employer in his employee’s provident fund on his behalf.
- Nil EPF filing process
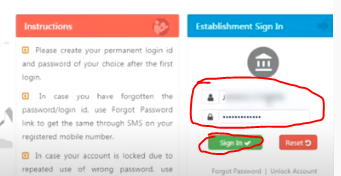
- open your browser and type epfindia.gov.in

2. This is EPF Government Portal.

3. Enter your username and password and click on the Sign-in option.
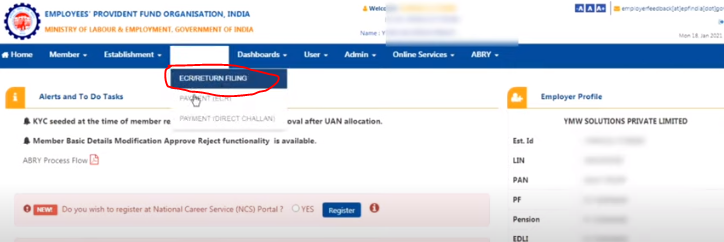
4. After logging in to the EPF portal, go to the payment option and under this option, you will see the option of ECRETURNFILLING, click on it.
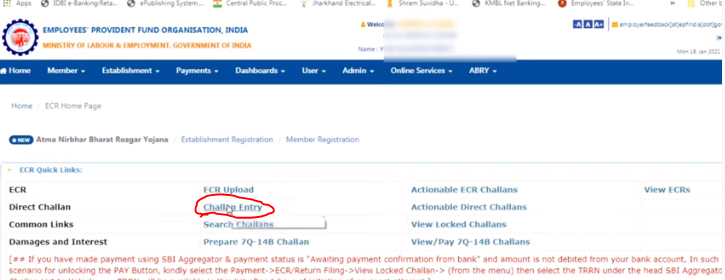
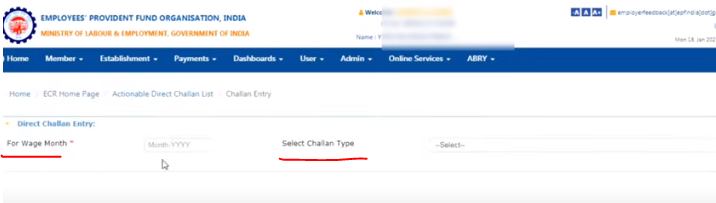
5. Click on the challan entry option.
6. After clicking on the challan entry option you will see two options month and challan type then enter your filling month and also your challan type.
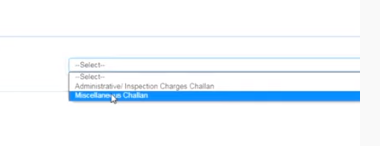
7. Select Form Type – Under this, if you have not left any employee data in your organization then select the administrative option and if you miss entering your employee details then select miscellaneous charges.
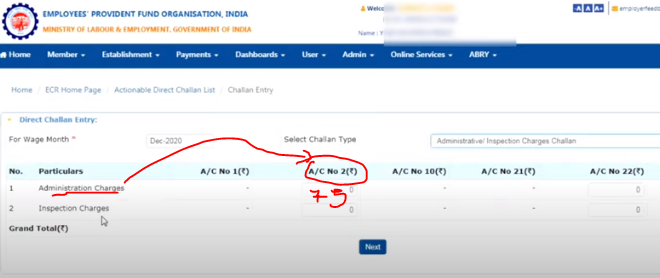
8. After doing all these steps, the next is to enter Rs 75 in account number 2 under Raw of Administration Charge.
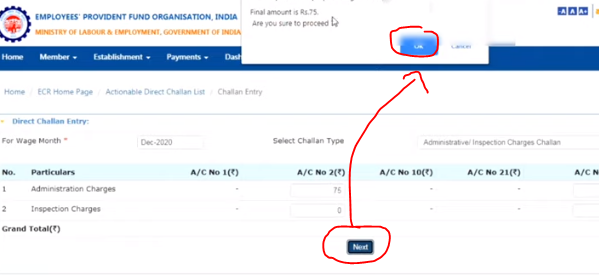
9. As soon as you click on the Next button, you will get a pop-up, in which you have to click on the Yes option.
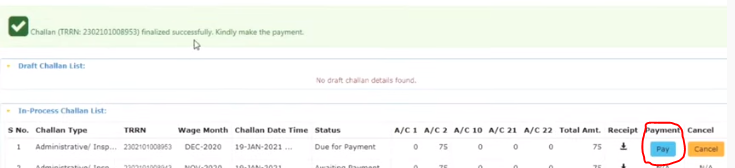
10. You will then receive a message notifying you that your challan has been saved, please finalize it, then you need to click on the finalize button so that it can proceed.

11. As soon as you click on finalize button you will get a pop-up so you have to click on the yes button after clicking on the yes option you will get your TRN number in your dashboard but after finalizing you will not be able to modify Your data may
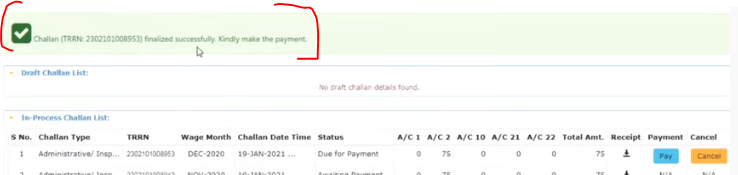
12. The last step is the payment step, as soon as you click on the pay option, it will take you to the site of your bank, where you will have to make the payment by entering your user ID and password.
Thanks